
How Much Does Drywall Repair Cost in Canada?
A practical Canadian guide to drywall repair estimates, the details that change the price, and how to compare quotes without relying on misleading per-square-foot averages.
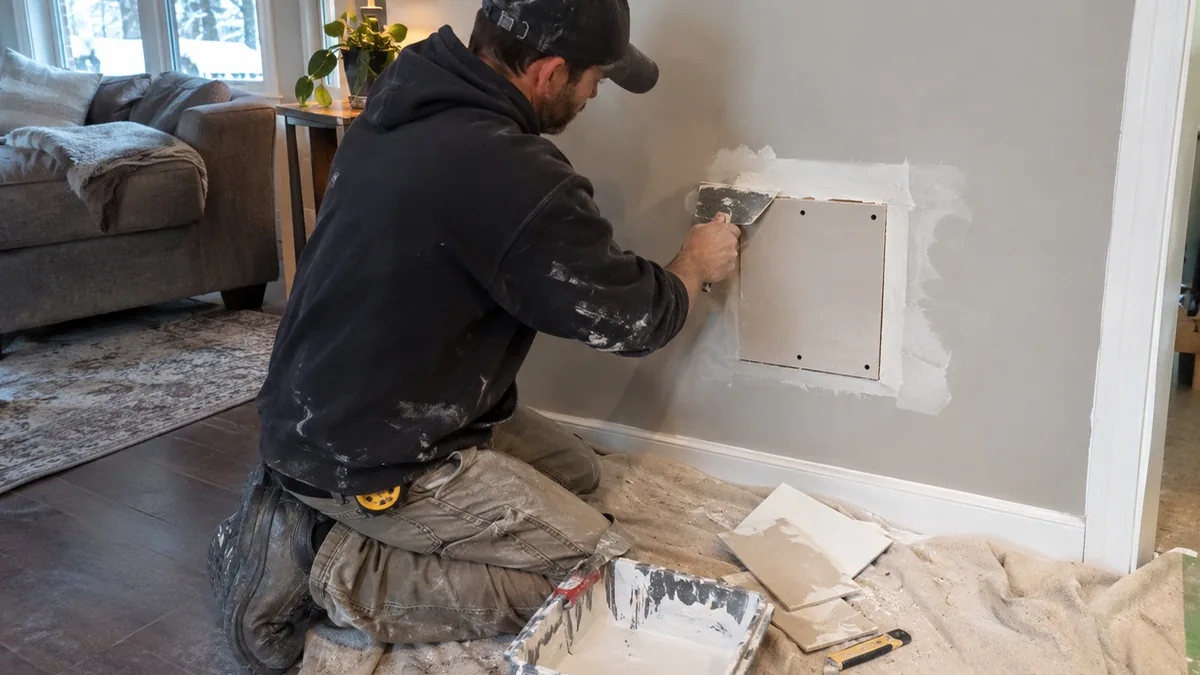
There is no dependable single price for drywall repair across Canada. A small nail hole, a ceiling opening after a plumbing repair and a wall with recurring water damage are different jobs, even if each is described as “a drywall patch.” The cost depends on what failed, how much material must come out, access, finish matching, drying time and whether painting is included.
For a current Canadian price reference, one Toronto-area drywall repair company publishes a broad estimate of $350–$700 plus tax for a repair visit. That is a local contractor’s planning range, not a Canada-wide rate or a guaranteed quote. A much older HomeStars dataset gives reported project totals from several Canadian cities, but its underlying prices are from 2022. Both sources help set expectations; neither can price your specific wall without a defined scope.
This guide explains what those figures do and do not tell you, and what a fair estimate needs to account for. Public cost figures often describe different countries, currencies, scopes and project sizes, so comparisons can give homeowners a false sense of precision. For a useful quote, define the repair and its finished result first.
Real Canadian price references, and their limits
| Published reference | Price shown | What it represents | Important limitation |
|---|---|---|---|
| PatchBoyz, Toronto/GTA, published April 19, 2026 | $350–$700 + tax | The company’s own broad estimate for a drywall repair job in its service area | The page calls this a “very high-level” range. It does not provide a standardized size, line-item scope or Canada-wide sample. |
| HomeStars, selected Canadian cities, underlying data dated March 2022 | $2,619–$9,898 city averages | Average reported drywall-contractor project totals in Ottawa, Calgary, Vancouver, Hamilton, Toronto, Barrie, Edmonton and Oshawa | These are broad project totals, not repair-only prices or current quotes. The platform’s reported city ranges include very large projects. |
HomeStars reports low and high recorded project amounts ranging from $100 to $350 at the low end and $11,000 to $50,000 at the high end across those cities. Those extremes show why the average is not a useful price for one patch: the category can include very different work. The page was updated in 2026, but its footnote says the project-cost data itself is from March 2022. Do not treat the page update date as the date of the underlying prices.
The practical takeaway is not that every Canadian repair costs a particular amount. It is that a contractor may have a minimum visit cost, and a defined multi-step repair can reasonably cost several hundred dollars even when the visible damage looks small. A localized published price is a better reference than a foreign “national average,” but it still needs a location and scope label.
Why a single Canadian price can mislead
Drywall is sold in standard panels, but repair work is not priced like buying a panel. A contractor may need to travel, protect the room, cut back damaged board, add backing, fit a patch, tape and coat it, return after the compound dries, sand, clean up and possibly prime or paint. The visible hole may be only a small part of the work.
Costs also differ by region. Labour rates, travel distances, material availability, local taxes, parking, building access and seasonal demand vary across provinces and territories. A city apartment with elevator booking and strict work hours is not the same job as an open, empty room with easy access. A quote from one region cannot automatically be applied to another.
Be cautious with a price quoted only “per square foot.” Small repairs often have a minimum visit or setup charge, while large projects may be priced by area, room, stage or an agreed scope. Those are not necessarily contradictory. They may reflect different ways of accounting for labour and overhead.
What changes the estimate?
Ask the contractor to identify the factors that apply to your repair. The most common are below.
| Cost factor | Why it matters |
|---|---|
| Damage type | A fastener hole, cracked seam, broken corner and water-damaged section need different preparation and repair methods. |
| Repair area | The cut-out may need to extend beyond the visible damage to reach sound board and clean edges. |
| Location | Ceilings, stairwells, high walls and areas behind fixtures can take longer to reach and protect. |
| Backing and framing | A patch may need backing or framing repair before new board can be fastened safely. |
| Number of visits | Joint compound needs drying time. Some repairs require several coats and separate visits. |
| Existing finish | Matching a texture or blending a repair into an aged surface can take additional work. |
| Painting | Spot painting may leave a visible difference. Repainting a full wall or ceiling is a separate scope unless clearly included. |
| Underlying cause | Leaks, movement, mould or damaged framing need attention before the surface is closed. |
| Occupied space and access | Furniture protection, dust control, parking and building rules affect setup and work time. |
The size of the damaged opening is not always the size of the repair. If water has travelled behind a wall, the contractor may need to remove more board to inspect the cavity and allow it to dry. If a crack follows a joint, simply filling its visible line may not hold if the tape has separated or the framing is moving.
Typical repair categories, without made-up price promises
It is more useful to compare the kind of work than to rely on an online dollar range that does not explain its assumptions.
Small holes and dents
Pinholes and shallow dents may need little more than filling and sanding, though a cluster of marks can take longer to blend than one isolated spot. A doorknob-sized hole or a damaged area with broken edges may need a board patch and backing. Ask whether the quote includes dust protection, compound, sanding and primer.
Cracks, lifted tape and nail pops
A hairline crack in paint is not automatically a drywall-only issue. It may be a surface crack, a failed tape joint, seasonal movement or a sign of moisture. Nail or screw pops can happen when fasteners move or the board shifts. A durable repair may involve removing loose material, adding or resetting fasteners, retaping and refinishing rather than covering the mark with compound.
Corners and damaged edges
An outside corner often has corner bead beneath the finish. If the bead is bent or loose, filling the surface without securing or replacing it can leave the corner vulnerable. Inside corners may need tape work. Include the full damaged length in photos and ask whether the quote repairs the corner assembly or only fills the visible chip.
Ceiling repairs
Ceiling work can cost more than a similar wall patch because the worker is overhead, protection is more involved, and texture or paint differences can show across a broad plane. A ceiling patch after a leak should not be priced as cosmetic repair until the source has stopped and the area has been assessed for moisture.
Water-damaged drywall
Water damage may involve demolition, drying, inspection, replacement board, finishing, primer and paint. It may also require a plumber, roofer, restoration contractor or other specialist to resolve the source. A drywall finisher should not promise that a patch alone will solve an active leak or hidden mould problem.
How to read a drywall repair quote
A clear quote should say what the contractor plans to do, what the price includes, and what could change it. Before accepting an estimate, look for:
- The repair location and approximate size. “Patch wall” is vague if there are several rooms or openings.
- Preparation and protection. Ask what will be covered, how dust will be controlled, and whether furniture must be moved by you.
- Removal and disposal. Confirm whether cutting out damaged board, bagging debris and disposal are included.
- Backing and board. Identify whether the contractor will add backing and what type or thickness of board is included, where relevant.
- Taping and finishing. Clarify whether joints, fasteners, corners, sanding and the agreed finish level are included.
- Texture and paint. State whether texture matching, primer and paint are included, and how far painting will extend.
- Drying and return visits. Ask how many visits are anticipated and whether the estimate includes them.
- Exclusions and hidden conditions. Find out what happens if the contractor finds wet insulation, damaged framing, wiring concerns or suspect materials.
- Tax and payment terms. Confirm applicable tax, deposit, payment milestones and the final amount due.
Two estimates are comparable only when they cover roughly the same result. One contractor might patch and sand; another may include a primer coat and repaint the full wall. The lower figure may be for less work, not better value.
A simple way to build your own scope before requesting quotes
You do not need to diagnose the wall. You can make the quote process more useful by recording what you can see.
- Name the surface. Wall, ceiling, inside corner, outside corner, stairwell or another location.
- Measure the visible damage. Record approximate width and height, not just “small” or “large.”
- Describe the material condition. Is the board soft, swollen, crumbling, stained, cracked, or simply dented?
- Explain when it appeared. Note a recent impact, leak, renovation, seasonal change or when you first noticed it.
- Mention previous repairs. Tell the contractor if the crack or patch has returned.
- State the desired finish. For example, ready for primer, ready for paint, or a textured surface blended as closely as practical.
- Send useful photos. Include one wide view for context and close-ups with a ruler or familiar object for scale.
Do not cut into a wall or ceiling just to make the quote easier. There may be electrical wiring, plumbing, insulation or materials that require assessment behind the board.
What a quote should not promise
Be wary of guarantees that an old texture or paint colour will be invisible, especially when the repair is local but the wall has years of fading, smoke, sunlight or previous coats. A skilled finisher can prepare a neat patch, but the final appearance depends on lighting, surface texture, paint sheen, paint batch and age.
Likewise, a low fixed price before anyone has seen extensive water damage may not include the actual repair once the area is opened. A responsible estimate should explain the visible scope and describe how hidden conditions will be handled. Ask for approval before extra work begins.
Can you do the repair yourself?
Small, dry, non-structural surface damage can be a reasonable DIY project if you have the time and tools. The challenge is often not filling the hole; it is making the repaired plane disappear under paint. A larger patch, ceiling damage, a recurring crack, a wet area or damaged corner can be harder to diagnose and finish well.
For DIY planning, distinguish between a shallow surface fill and a board replacement. A larger opening usually needs a secure patch, support at its edges, joint tape and multiple thin coats of compound. Let each coat dry according to the product directions, avoid building a hump, and sand carefully while controlling dust. Do not assume that mesh tape, paper tape and compound are interchangeable in every repair; follow the product system and the condition of the joint. If you are trying to work out whether the visible mark is only cosmetic, our guide to drywall cracks, nail pops and tape seams explains common causes and signs that call for a closer assessment.
Stop and get qualified help if you suspect a leak, mould, structural movement, damaged wiring, plumbing, or older materials that could contain asbestos. Health Canada advises avoiding disturbance of materials that may contain asbestos and hiring a professional to test before renovation when asbestos is suspected. See its asbestos and health guidance.
How to estimate the total project, not just the patch
For a repair, the total project can include more than drywall labour. Depending on the cause, you may also need leak repair, drying, insulation replacement, mould assessment, painting or trim removal and reinstallation. Ask each trade to state its boundary. For instance, a drywall repair estimate may exclude plumbing work and repainting outside the patched area.
The sequence matters:
- Stop the source of water or movement.
- Assess the affected area, including concealed materials where appropriate.
- Remove unsound material and allow the area to dry as directed by the responsible professional.
- Repair framing or services if needed.
- Install and finish the drywall.
- Prime and paint the agreed area.
If you skip an earlier step, the new finish may fail and the repair may need to be repeated. This can cost more than identifying the full scope at the outset.
Questions to ask before you hire
- Who will do the work, and who is responsible for the finished result?
- Is the quote based on a site visit, photos or a description?
- What finish level or visual standard is included?
- Does the quote include materials, protection, cleanup, tax and painting?
- How will you handle dust, furniture and access?
- What hidden conditions could change the price?
- Will additional work be approved in writing before it starts?
- What should I do before the crew arrives?
Check references, insurance and written terms appropriate to the job. If the work forms part of a larger renovation, coordinate timing with the other trades so that plumbing, electrical and inspections are complete before the wall is closed.
How Drywallah approaches a repair request
For a useful initial discussion, share the room, the surface, approximate dimensions, clear photos and anything you know about the cause. Drywallah offers drywall repair for holes, cracks and damaged surfaces; the right scope depends on the condition behind and around the visible damage. A photo can help describe the issue, but it cannot confirm concealed moisture, framing or hazardous materials. If the wall became wet, read our guide to drywall water damage and when to replace it before scheduling a surface repair.
The goal of an estimate is not simply to name a price. It is to make clear what will be repaired, what finish you can expect, what is excluded and what would change the scope. When you compare quotes on those points, you can make a decision based on the work rather than a number without context.
Frequently asked questions
Is drywall repair usually charged by the square foot?
Not always. Small repairs may include a minimum visit or setup charge. Larger projects may be priced by area or by a defined scope. Ask what the price unit includes and compare estimates with the same work included.
Why can a small patch have a substantial minimum charge?
Travel, setup, protection, materials, drying between coats and cleanup take time even when the visible opening is small. A contractor may also need more than one visit to finish it.
Does a drywall repair quote include painting?
Only if it says so. Some quotes stop at a sanded, ready-to-prime surface. Others include primer, paint or repainting a larger section. Confirm the paint scope and who supplies the paint.
Can a contractor quote from photos?
Photos can help assess a simple visible repair and decide whether a site visit is needed. They cannot reveal hidden framing, wiring, moisture or the condition behind a wall.
How can I get a more accurate estimate?
Give the contractor the location, approximate dimensions, cause if known, photos, access details and your desired finish. Ask for a written scope that identifies exclusions and how unexpected conditions will be approved.
Sources and further reading
- Health Canada: Asbestos and your health
- Health Canada: Guide to addressing moisture and mould indoors
Prices change and vary by scope and location. This guide is a quote-planning resource, not a price list. Ask for a written estimate based on the actual repair.
Price sources checked
- PatchBoyz: Drywall repair costs in Toronto, published April 19, 2026. The business states a broad $350–$700 plus tax estimate for Toronto/GTA repairs and notes that scope changes the price.
- HomeStars: Guide to drywall contractor costs and estimates in Canada, page updated August 21, 2026. Its cost table says the underlying 2,093 verified homeowner reviews date to March 2022; city averages and ranges are for all drywall contractor projects, not repair-only work.