
Drywall Ceiling Repair in Canada: Causes, Safety and What to Expect
How to respond to a ceiling crack, hole, stain or sag, when to keep clear, and what a proper drywall ceiling repair should address.
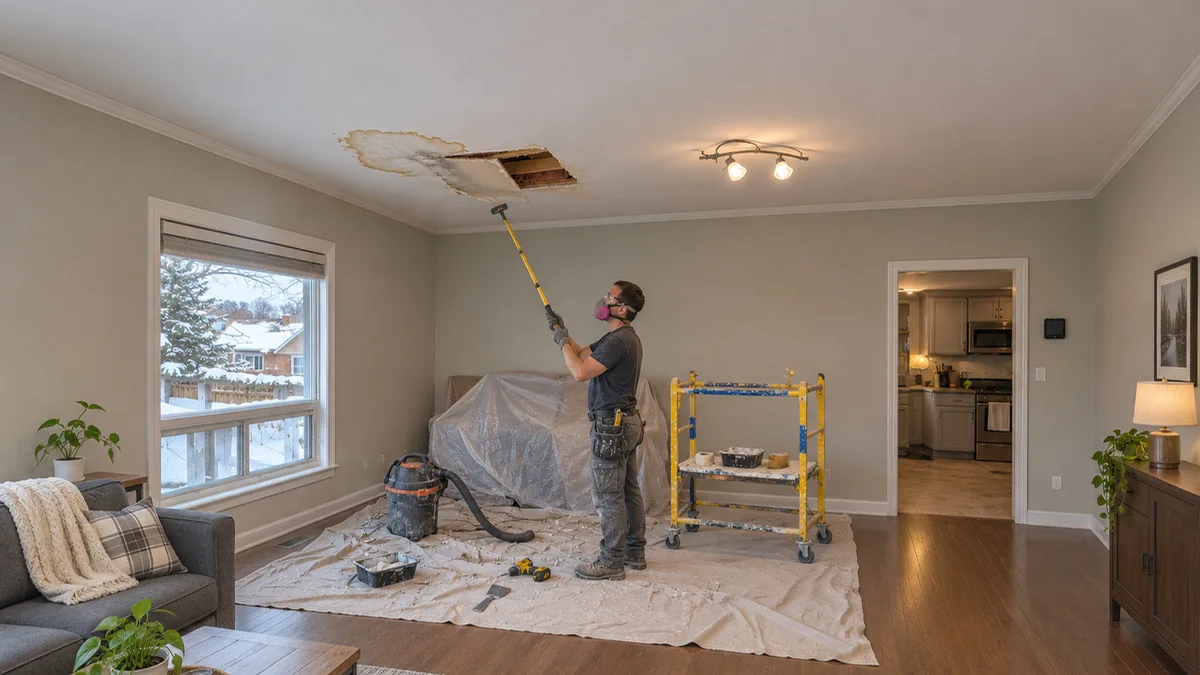
A drywall ceiling repair should start with the cause, not the patch. A small stable hole may need a straightforward repair, but a growing crack, water stain, soft area or sag can signal moisture, framing movement or a loose section overhead. Keep clear of a bulging or visibly sagging ceiling, especially if it is wet. Once the area is safe and the cause has been addressed, the damaged board can be assessed and repaired to suit the existing surface.
This is a homeowner’s planning guide, not structural advice. A photo cannot confirm what is happening above a ceiling. If there is active leaking, electrical exposure, extensive damage, or uncertainty about the structure, get the appropriate qualified trade to assess it before drywall work begins.
What should you do first?
If the ceiling is sagging or bulging
Keep people and pets out of the area. Do not stand below it, press on it, climb into the ceiling cavity, or puncture it to drain water. A wet ceiling can be heavy and may fail without warning. If water is near a light fixture, wiring, or other electrical equipment, do not touch the area or operate switches. Contact an electrician or emergency service as appropriate.
If you can safely identify a plumbing leak, shut off the relevant supply. A roof leak, plumbing failure, overflowing appliance, or water entry from above must be corrected before the ceiling is closed. The drywall contractor may repair the surface, but a drywall patch cannot fix the source.
If the damage is a stain or small crack
Take a photograph and note when it appeared. Check whether it changes after rain, snow melt, a bath, or plumbing use. Do not cover a fresh stain with primer or paint until you know whether the surface is dry and the source has stopped. A stain can persist after a leak has been fixed, but recurring or expanding discoloration needs investigation.
If the home is older and a repair requires cutting, sanding or scraping, consider whether drywall-related materials could contain asbestos. Health Canada advises professional testing before renovation when asbestos is suspected. Do not disturb suspect materials based on appearance alone.
Common ceiling problems and what they can mean
| What you see | Possible explanation | What should be checked |
|---|---|---|
| Hairline crack at a joint | Joint movement, prior repair, seasonal movement or installation issue | Whether it is changing, whether the tape is loose, and whether moisture is present |
| Nail or screw marks | Fastener movement, board movement or a previous repair | Whether the panel is secure to framing |
| Water stain | Past or active leak, condensation or water from an adjacent area | Source, moisture in the cavity, insulation and framing condition |
| Soft, swollen or crumbly board | Prolonged moisture or physical damage | Extent of damaged board and condition behind it |
| Sagging or bulging | Wet board, failed fastening, inadequate support or another assembly issue | Safety first; qualified assessment before repair |
| Hole around a fixture | Access opening, impact or work by another trade | Wiring, backing, edges, and safe access for patching |
These are clues, not diagnoses. Several causes can produce similar marks. Our guide to recurring drywall cracks and nail pops explains why repeatedly filling a crack may not solve the underlying issue.
Repair or replace the affected section?
The choice depends on the condition of the board and what is behind it. An intact, dry panel with a small, stable defect may be repairable. Wet, softened, swollen, crumbling, contaminated or mould-affected board may need removal. The contractor should identify how far the damaged material extends and whether the cavity can be inspected and dried.
Do not decide only by the visible stain size. Water can travel along framing, insulation or the back of the ceiling board. A small mark can conceal a larger wet area, while a larger old stain may be dry and stable. Moisture readings can help an assessment, but one reading is not a complete diagnosis.
Health Canada’s moisture and mould guidance emphasizes addressing the moisture source. If mould is extensive, recurring, or suspected behind the surface, consult a qualified remediation professional. Painting over mould does not correct the cause.
What does a proper repair involve?
The exact sequence depends on the defect, but a clear scope usually covers:
- Cause and safety review. Confirm the source has stopped and the work area can be accessed safely.
- Protection and access. Protect flooring and furnishings, manage dust, and plan around fixtures.
- Removal or stabilization. Remove unsound board or secure the area where the assembly permits repair.
- Backing and patching. Provide support for the patch and fasten replacement board appropriately.
- Joint treatment. Tape and compound the seams, fasteners and corners as needed.
- Drying and finishing. Allow coats to dry, sand or otherwise prepare the surface, then inspect under suitable light.
- Primer and paint. Confirm whether these are included and whether a wider ceiling area needs repainting for a consistent appearance.
Ceilings are overhead work, so access, protection and safe handling can matter as much as patch size. A small patch can still require multiple visits for compound to dry and for the finish to blend.
Why matching a ceiling can be difficult
A repaired area may differ from the original because of texture, paint age, sheen, lighting or previous patch layers. A smooth repair on a textured ceiling can stand out even if the patch is flat. The contractor should explain whether the scope is a local repair, a wider skim, texture matching, or repainting the full ceiling.
If the ceiling has a popcorn or other older texture, pause before scraping or sanding. The material may need asbestos assessment. Read the popcorn ceiling safety and planning guide before deciding how to proceed.
What changes the estimate?
Ceiling repair estimates depend on more than the visible opening. Factors include:
- Height, access and room protection
- Whether the board is dry and secure
- The size and shape of the area that must be removed
- Need for backing, framing repair or insulation replacement
- Number of finish coats and drying visits
- Texture or paint matching
- Fixture removal, electrical work, or other-trade coordination
- Cleanup, disposal, primer, paint and tax
The drywall repair cost guide explains why published repair prices should be treated as local examples rather than a Canada-wide rate. Ask for an itemized scope and identify exclusions before comparing estimates.
Questions to ask a contractor
- What do you think caused the damage, and has that cause been corrected?
- Will you inspect the cavity or replace only the visible surface?
- Is the board dry and firm enough to remain?
- How will you protect the room and manage dust?
- Is the work limited to drywall, or are framing, insulation, electrical or plumbing repairs needed?
- What finish and paint work are included?
- How many visits should I expect, and what conditions could change the schedule?
- If the ceiling material is older or unknown, what assessment is needed before disturbance?
Bottom line
Treat a ceiling defect as a sign to assess, not just cover. Keep clear of a sagging or wet ceiling, make sure leaks and other causes are resolved, and determine whether the board and cavity are sound before closing the surface. A written quote should explain the repair method, finish, painting, access and cleanup. For a drywall repair assessment, share the room, approximate dimensions, when the damage appeared, and any known leak or previous repair.