
How Long Does a Drywall Project Take? A Canadian Homeowner’s Timeline
Plan the stages between framing and paint, understand why drywall finishing requires return visits, and avoid scheduling around a misleading one-day estimate.
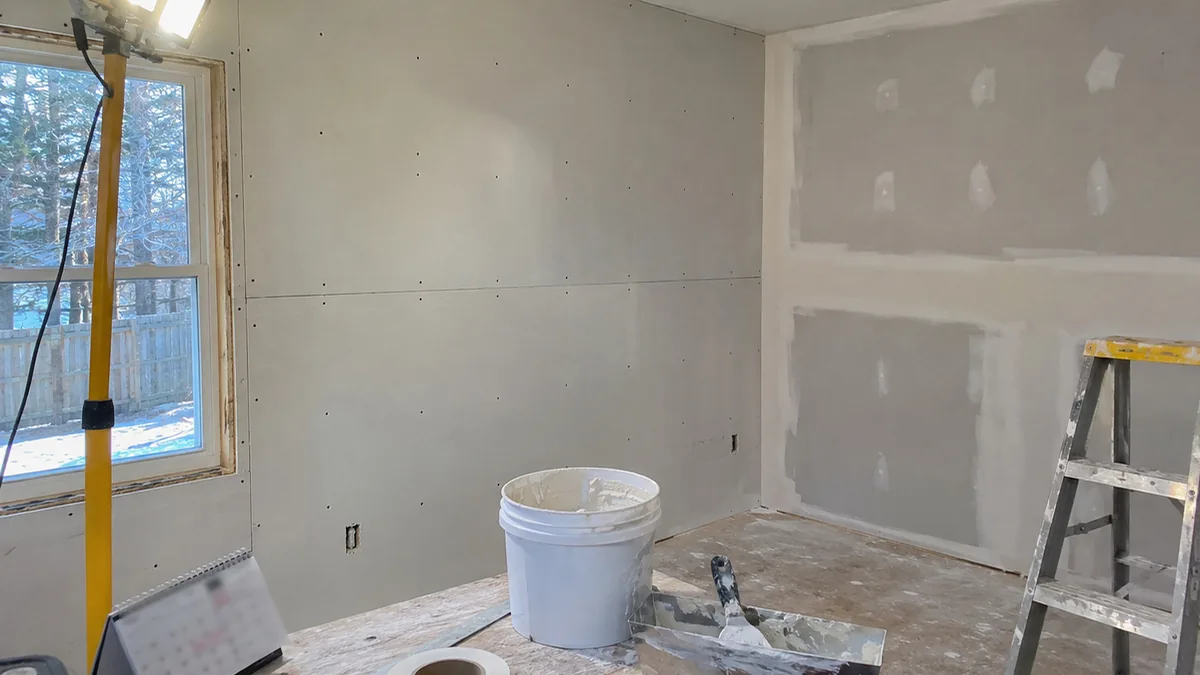
A drywall project usually takes longer than the day the boards go up. Installation is followed by joint treatment, additional coats, drying, sanding, inspection, and often primer or paint. A small repair may be finished over several visits, while a room or renovation depends on area, access, crew size, ceiling work, substrate condition, and drying conditions. Ask for a stage-by-stage schedule rather than a single promise about the completion date.
This guide describes a typical sequence, not a fixed duration. Compound drying time changes with product, temperature, humidity, ventilation, coat thickness, and the condition of the space. Product instructions and the contractor’s site assessment govern the actual schedule.
Typical sequence
| Stage | What happens | What can affect the schedule |
|---|---|---|
| Scope and preparation | Confirm surfaces, board, finish, protection, access, and trade coordination | Hidden damage, material testing, permits, tenant or building rules |
| Framing and services check | Review backing, framing, insulation, wiring, plumbing, and required inspections | Corrections or inspections before closing walls |
| Board installation | Measure, cut, hang, and fasten panels; install beads and trims | Room shape, ceilings, openings, board type, delivery, and access |
| First coat | Bed tape and treat joints, corners, and fasteners | Finish system, crew, temperature, humidity |
| Additional coats | Build and feather joints and fasteners | Drying between coats and required finish level |
| Sanding and inspection | Smooth the surface and correct visible defects | Lighting, dust control, repair findings |
| Primer and paint | Seal the surface and apply the agreed coating | Separate trade availability, product recoat instructions, room conditions |
The steps can overlap across different rooms, but each surface must be ready before the next coating stage. A contractor may work in one room while another dries.
Before board goes on
Agree on what surfaces are included and the final finish. Confirm whether existing material will be removed, whether framing or insulation work is included, and who handles electrical or plumbing changes. If older materials may contain asbestos, assessment must happen before disturbance. Health Canada recommends professional testing before renovation when asbestos-containing materials are suspected.
For a renovation, the wall cavity may need inspection, repairs, photographs, or municipal inspection before it is closed. Building-code requirements and permit processes vary across Canada. Do not assume a drywall crew can close a wall before required inspections are complete.
Prepare the work area by moving furniture and fragile items, arranging access, protecting belongings, and confirming where materials can be staged. In condos or multi-unit buildings, book elevators and follow work-hour and debris rules. Delays in access can affect even a small job.
Board installation is only one stage
Once the area is ready, panels are cut to fit framing and openings. The installer manages seams, corners, fasteners, and transitions. Ceilings can add complexity because of overhead work and access. Irregular framing, curved surfaces, numerous openings, and tight rooms also change production time.
After hanging, a site should be cleared of loose debris and the work checked before finishing. Keep the agreed ventilation and temperature conditions where practical. Do not direct heaters at fresh compound or use unapproved shortcuts to force drying; rapid or uneven drying can interfere with the finish.
Why taping and finishing involve multiple passes
Joint compound is applied in stages. Tape is embedded at joints, then additional coats widen and feather the joint so it blends into the board. Corners, fasteners, trims, and patches receive their own treatment. Each coat needs to dry sufficiently before the next operation.
The target finish also matters. A standard Level 4 finish is common under many flat paints and ordinary lighting. Level 5 adds a skim coat over the surface and may be specified where critical lighting, gloss paint, or a more uniform appearance makes surface variation more visible. It still does not make a wall perfectly flat. See our Level 4 versus Level 5 guide when choosing the finish.
Drying is not the same as curing or recoat readiness for every product. Follow the compound manufacturer’s label and the contractor’s instructions. Cold rooms, high humidity, poor air movement, thick coats, and insufficient time can delay work. A calendar estimate that ignores these conditions is unreliable.
Sanding, dust, and room readiness
Sanding or other finishing methods prepare the surface for inspection and primer. Dust control should be discussed before work starts. Ask what protection will be used, which nearby rooms are affected, and how the work area will be cleaned. A finished wall should be checked under lighting similar to the room’s normal use, since raking light can reveal joint ridges or tool marks that are not obvious in diffuse light.
Before primer, confirm that the surface is dry and ready. Primer helps even out absorption between paper and compound; it does not correct a poor finish. Painting before the drywall work is accepted can create rework if additional sanding or patching is needed.
Repair timelines differ
A small repair still may require multiple visits because a patch can need backing, tape, compound, drying, sanding, primer, and paint. The visible damage may be small while the repaired area must be feathered over a larger surface. Water damage also requires the source to be fixed and the cavity assessed before replacement. See the guide to water-damaged drywall.
Ask whether the quote includes paint and whether the colour and sheen can be matched. Even when the repair compound is blended well, new paint may look different from aged paint. Painting a full wall or ceiling can produce a more consistent appearance, but it expands scope.
Build a realistic schedule
Use this checklist with your contractor:
- Identify every room and surface in scope.
- Confirm when framing, electrical, plumbing, and inspections will be complete.
- Ask how many work visits are expected and what work occurs on each.
- Ask what conditions the compound requires for drying.
- Confirm when sanding, cleanup, primer, and paint happen.
- Add time for concealed damage, access restrictions, and trade coordination.
- Do not move furniture back or book final decorating until the surface is accepted and dry.
Avoid relying on a generic “one day” promise. It may mean only the board is installed, not that the wall is finished and ready for paint. Your quote should state the endpoint: board hung, finished to an agreed level, primed, or painted.
Bottom line
Drywall work is a sequence, and finishing often requires return visits. The schedule depends on the surface area, complexity, room conditions, trades, inspections, and finish level. Ask for a written schedule with clear milestones and confirm what “complete” means before comparing estimates. For a drywall installation quote, share room measurements, ceiling height, access details, and the intended finish.
Sources
- Health Canada: Asbestos and your health, including advice to hire a professional to test suspect materials before renovation.
- Gypsum Association GA-214: Levels of Finish for Gypsum Panel Products, for finish-level distinctions.
- National Research Council Canada: Model code adoption across Canada, for the jurisdictional adoption of model codes.